
DIY Balloon Heart Sayings for Valentine's Day!
- Stephanie
- Feb 12, 2017
- 2 min read

Love is in the air! And I can't believe it's already Valentine's Week! Need a fun DIY present? Grab some heart-shaped foil balloons and create a sweet Valentine's message! I'll be using the following supplies:
• Two (2) Red Heart-Shaped Foil Balloons
• White Copy Paper (make sure to use lightweight paper)
• Scissors
• Tape
Directions:
1. First, grab your We R Memory Keepers Alphabet Punch Board and a sheet of copy paper.

2. Create four (4) 5x3in pieces of paper for your letters and heart. We will create three (3) letters ("I", "Y" & "A") and a heart shape.

In Steps 3 - 6, I'll demonstrate how to make the letter "A". For a full list of directions on how to create all the letters using We R Memory Keepers Alphabet Punch Board, download this PDF.
3. To make the letter "A", grab a 5x3in piece of paper and place it under the D-Shaped cutter. Press down to create the cut.

4. Flip the piece of paper and create another D-Shaped cut.

5. Go back to the top-left cutting area and cut off along the highlighted lines as shown below:
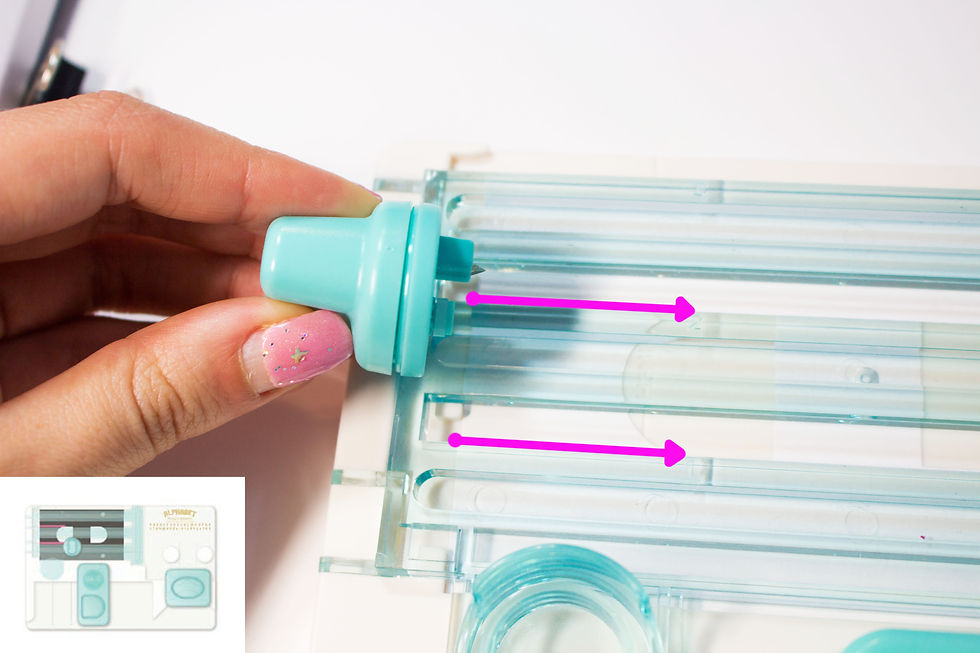
The piece of paper should now look like this:

5. Move down to the curve cutter (oval-shaped) on the bottom-righthand corner. Place the top corner of the "A" under the curve cutter and press down.

6. Flip the "A" and cut the other top corner using the corner cutter. You now have an "A"!

7. For the other letters, "I" and "Y", see the diagrams below:
Steps for the letter "I":

Steps for the letter "Y":

8. For the heart, I free-handed the shape and cut it with scissors.

9. Next, place tape on the backs of the letters and heart.

10. And add them on the balloons! The "I" and heart shape are placed on one balloon and the "YA" on the other.
I hope you all have a wonderful Valentine's Day! Until then, Live Creatively!
♥ Stephanie
